Transcription:
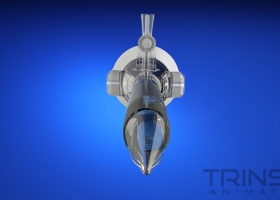
Vilex mini rails are external fixators used in hand and foot surgeries .They are ideal for revision of a failed surgery for example mal or non-union distraction of an impacted joint or bone lengthening using ocio genesis to name a few.
In this procedure we will demonstrate the use of a vilex mini rails to lengthening the first meditorcial.
The first step is to decide the size of the rails in half pins and the position of the half pin, we prepare the selected rails by losing the stationary carriage and repositioning the traveling carriage mid way along the rail, slightly losing the locking screw for easier insertion of the half pins to the clamp opening.
It’s advisable to insert the half pins before making the ocio tamy with the surgical pen mark the desired location for the 2 half pins, one on each side of the proposed ocio tamy. The pin should be about 25mm apart, established the location of the ocio tamy make sure the 2 distal pins avoid the medial head while the proximal pins can capture the second mid even the first geneva form.
Use a 1.6mm k-wire with the first proximal pin will be, position the wire perpendicular to the bone surface, the wire is used puncher the cortex, remove the wire and insert the first half pin repeat the procedure for the second pin, attempt to drive the wire parallel to the first half pin it is desirable, but not essential to place all 4 pins exactly parallel to each other and in the same plane .
The first 2 pins can be offed as much as 30 degrees from each other, with the 2 pins in place slide the rails over the 2 pins, position the traveling carriage distally and then engage the stationary carriage.
Tightening the screw on bottom of the stationary carriage.This carriage must not move introduce the 2 half pins using the rails itself as a template adjusting the clamp open is necessary, avoid excessive losing of clamps tighten the screw without walking them to allow the rail body free movement so that it can be align parallel to the meditorcial shaft.
The screws should be loose enough to make the adjustments holding the foot with one hand, adjust the orientation on the rails access so it’s parallel to the direction of distraction or compression as the case may be, Next loosen the clamp enough to remove the mini rail while leaving the pins in rails make a small incision and expose the bone, mark the ocio tamy location when making the cut make sure the periosteum intact extent the incision to facilitate access.
With an ocia tamy make sure the distal fragment is totally free, notice that the pin are introduced first before making the mid-shaft cut, this will ensure that the compression and distraction of the 2 fragments will remain collinear without any do reflection or plat reflection. we engage the mini rails to the pins and generally tighten the 2 locking screws on top by hand, again tighten the screws without locking them. This allows rails body free movement, so but can be aligned parallel to the midtortail shaft. Adjust the positioning of the each pin using the multi purpose tool advancing or retracting as necessary, there is no loss of purchase of a pin retracted. Holding the foot with one hand adjust the position and orientation of the rails access to be parallel to the direction of distraction or compression as the case may be.
The Rails should be positioned about 15mm away from the foot to allow for possible swelling following surgery, With the orientation established hold the position while the assistant lock the half pin carriages. Use an angle branch distract and reclose ocia tamy and watch out the bones surfaces compressed todays each other to initiate ocia tamy genesis began by compressing the ocia tamy firmly for a few days before controlled distraction is initiated close and treat it normally.
for more information visit http://vilex.com


